

ChatGPT Integration
Pie.host exposes an MCP server at https://piehost.com/mcp, which lets ChatGPT read your PieSocket, PieDB, PieApp and other resource data directly inside a chat. Connecting it takes a couple of minutes and only needs your Pie.host login, no API keys to copy around.
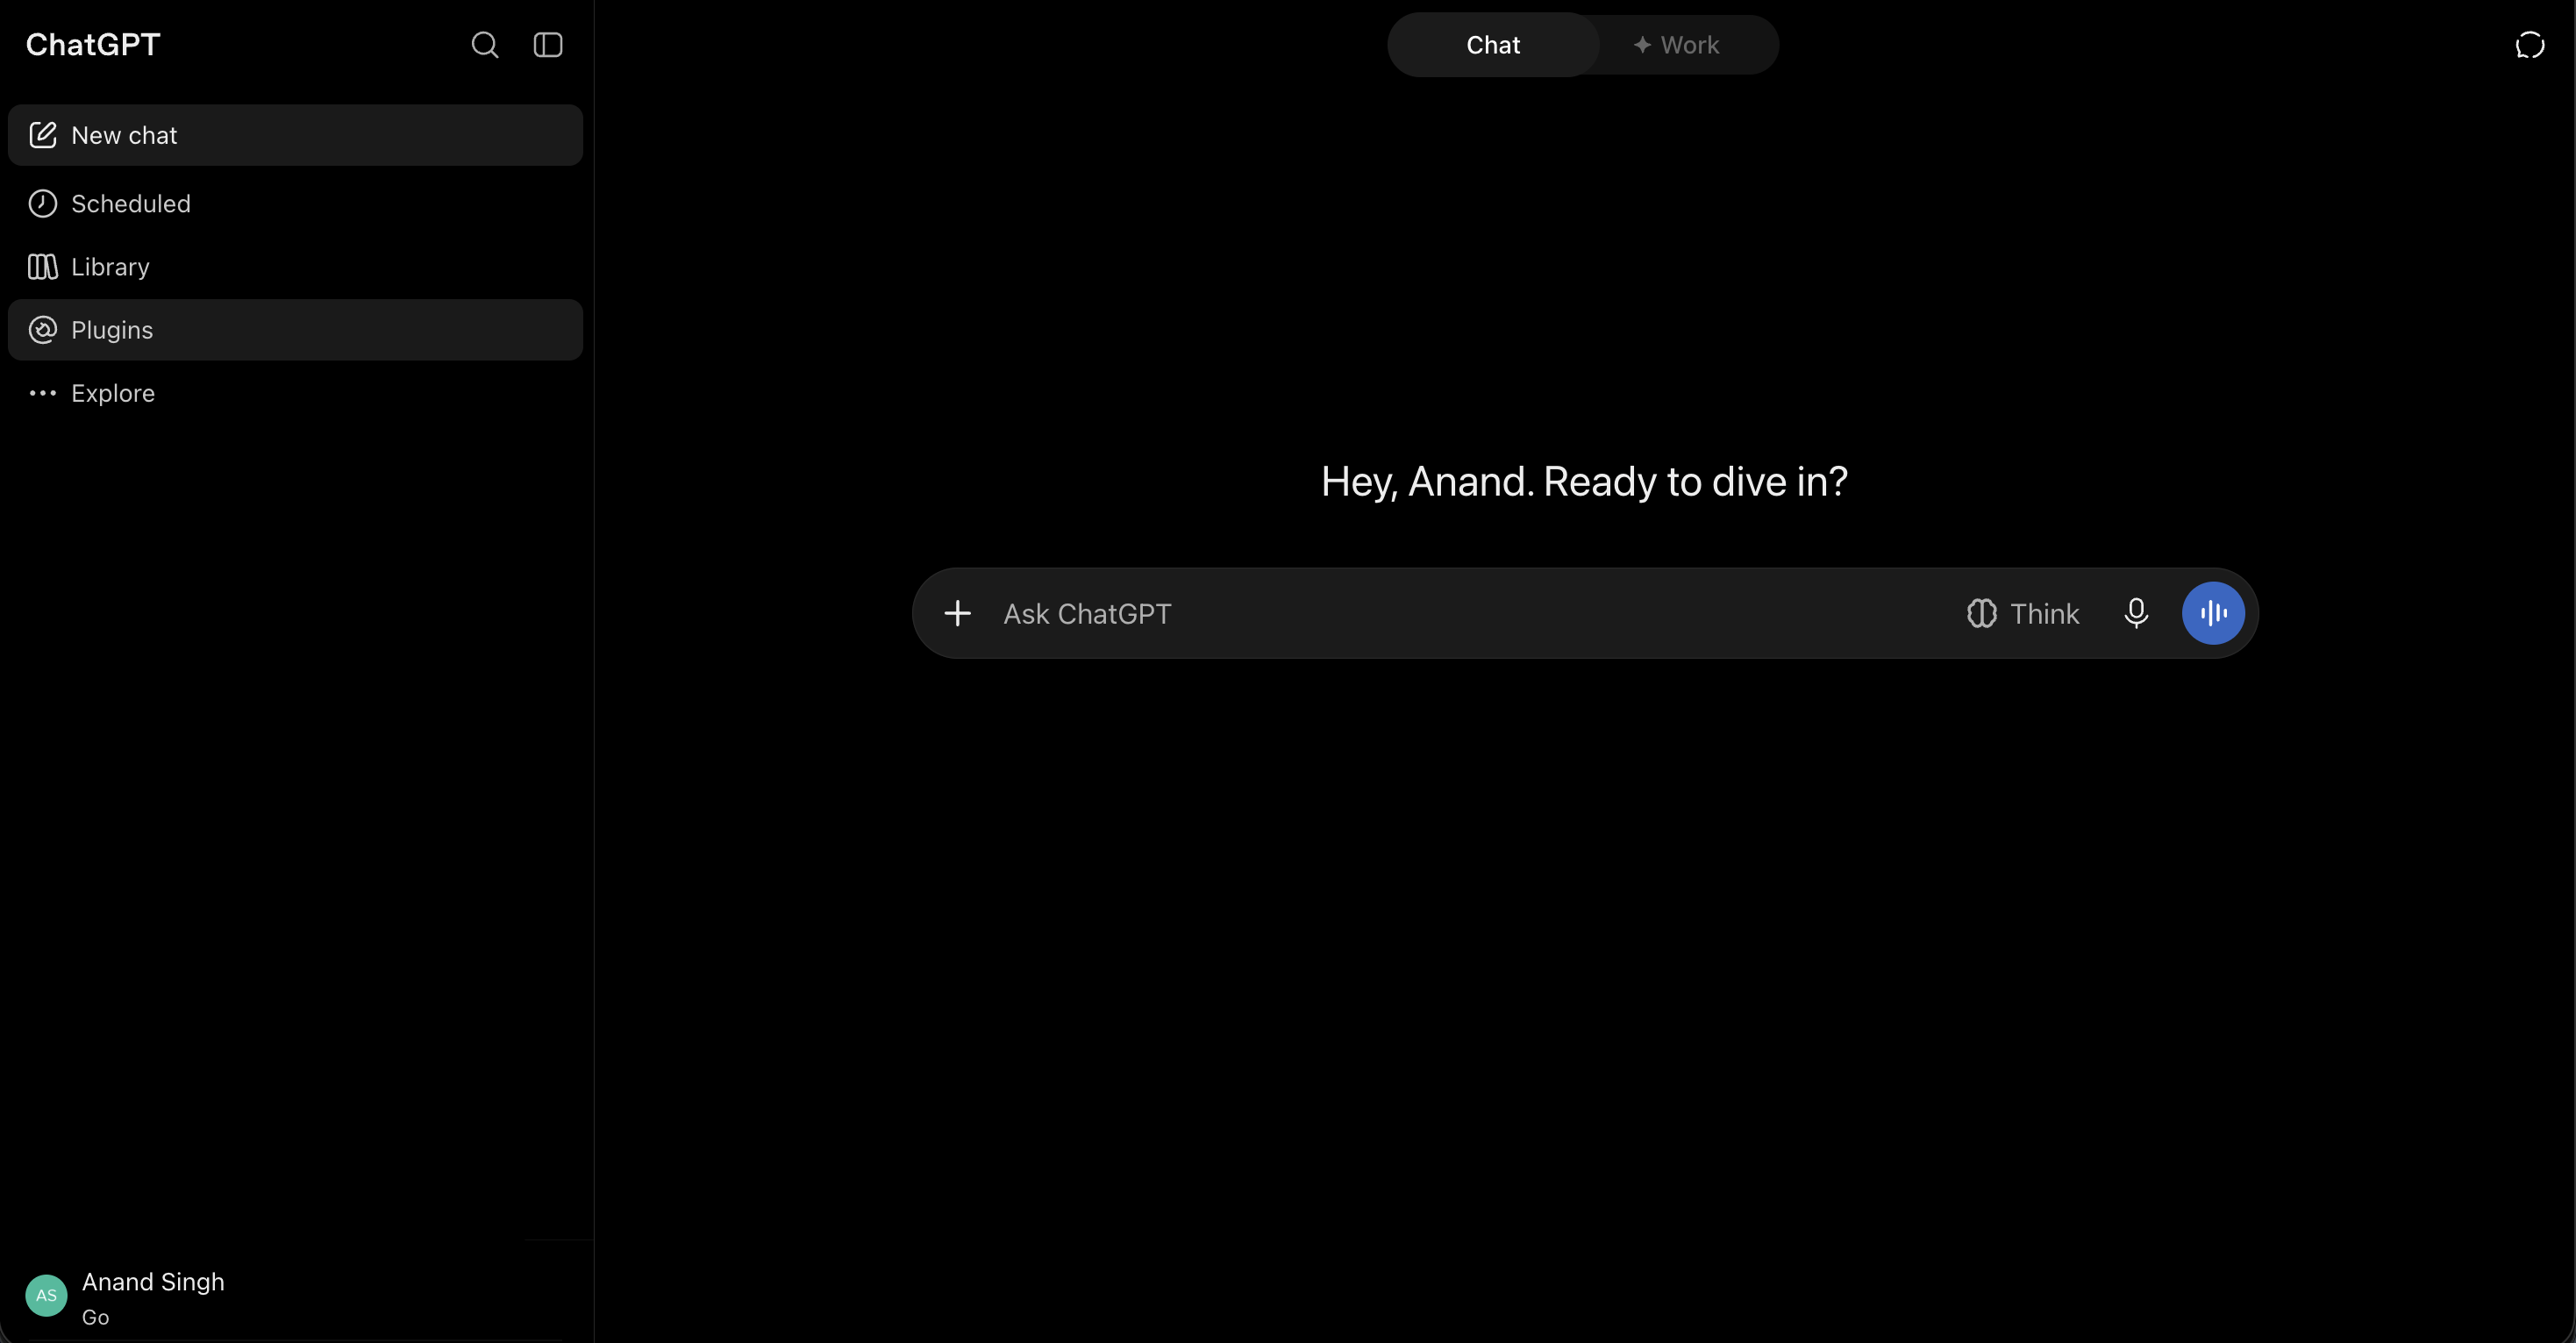
- Open Plugins in ChatGPT
In ChatGPT, open the sidebar and go to Plugins.
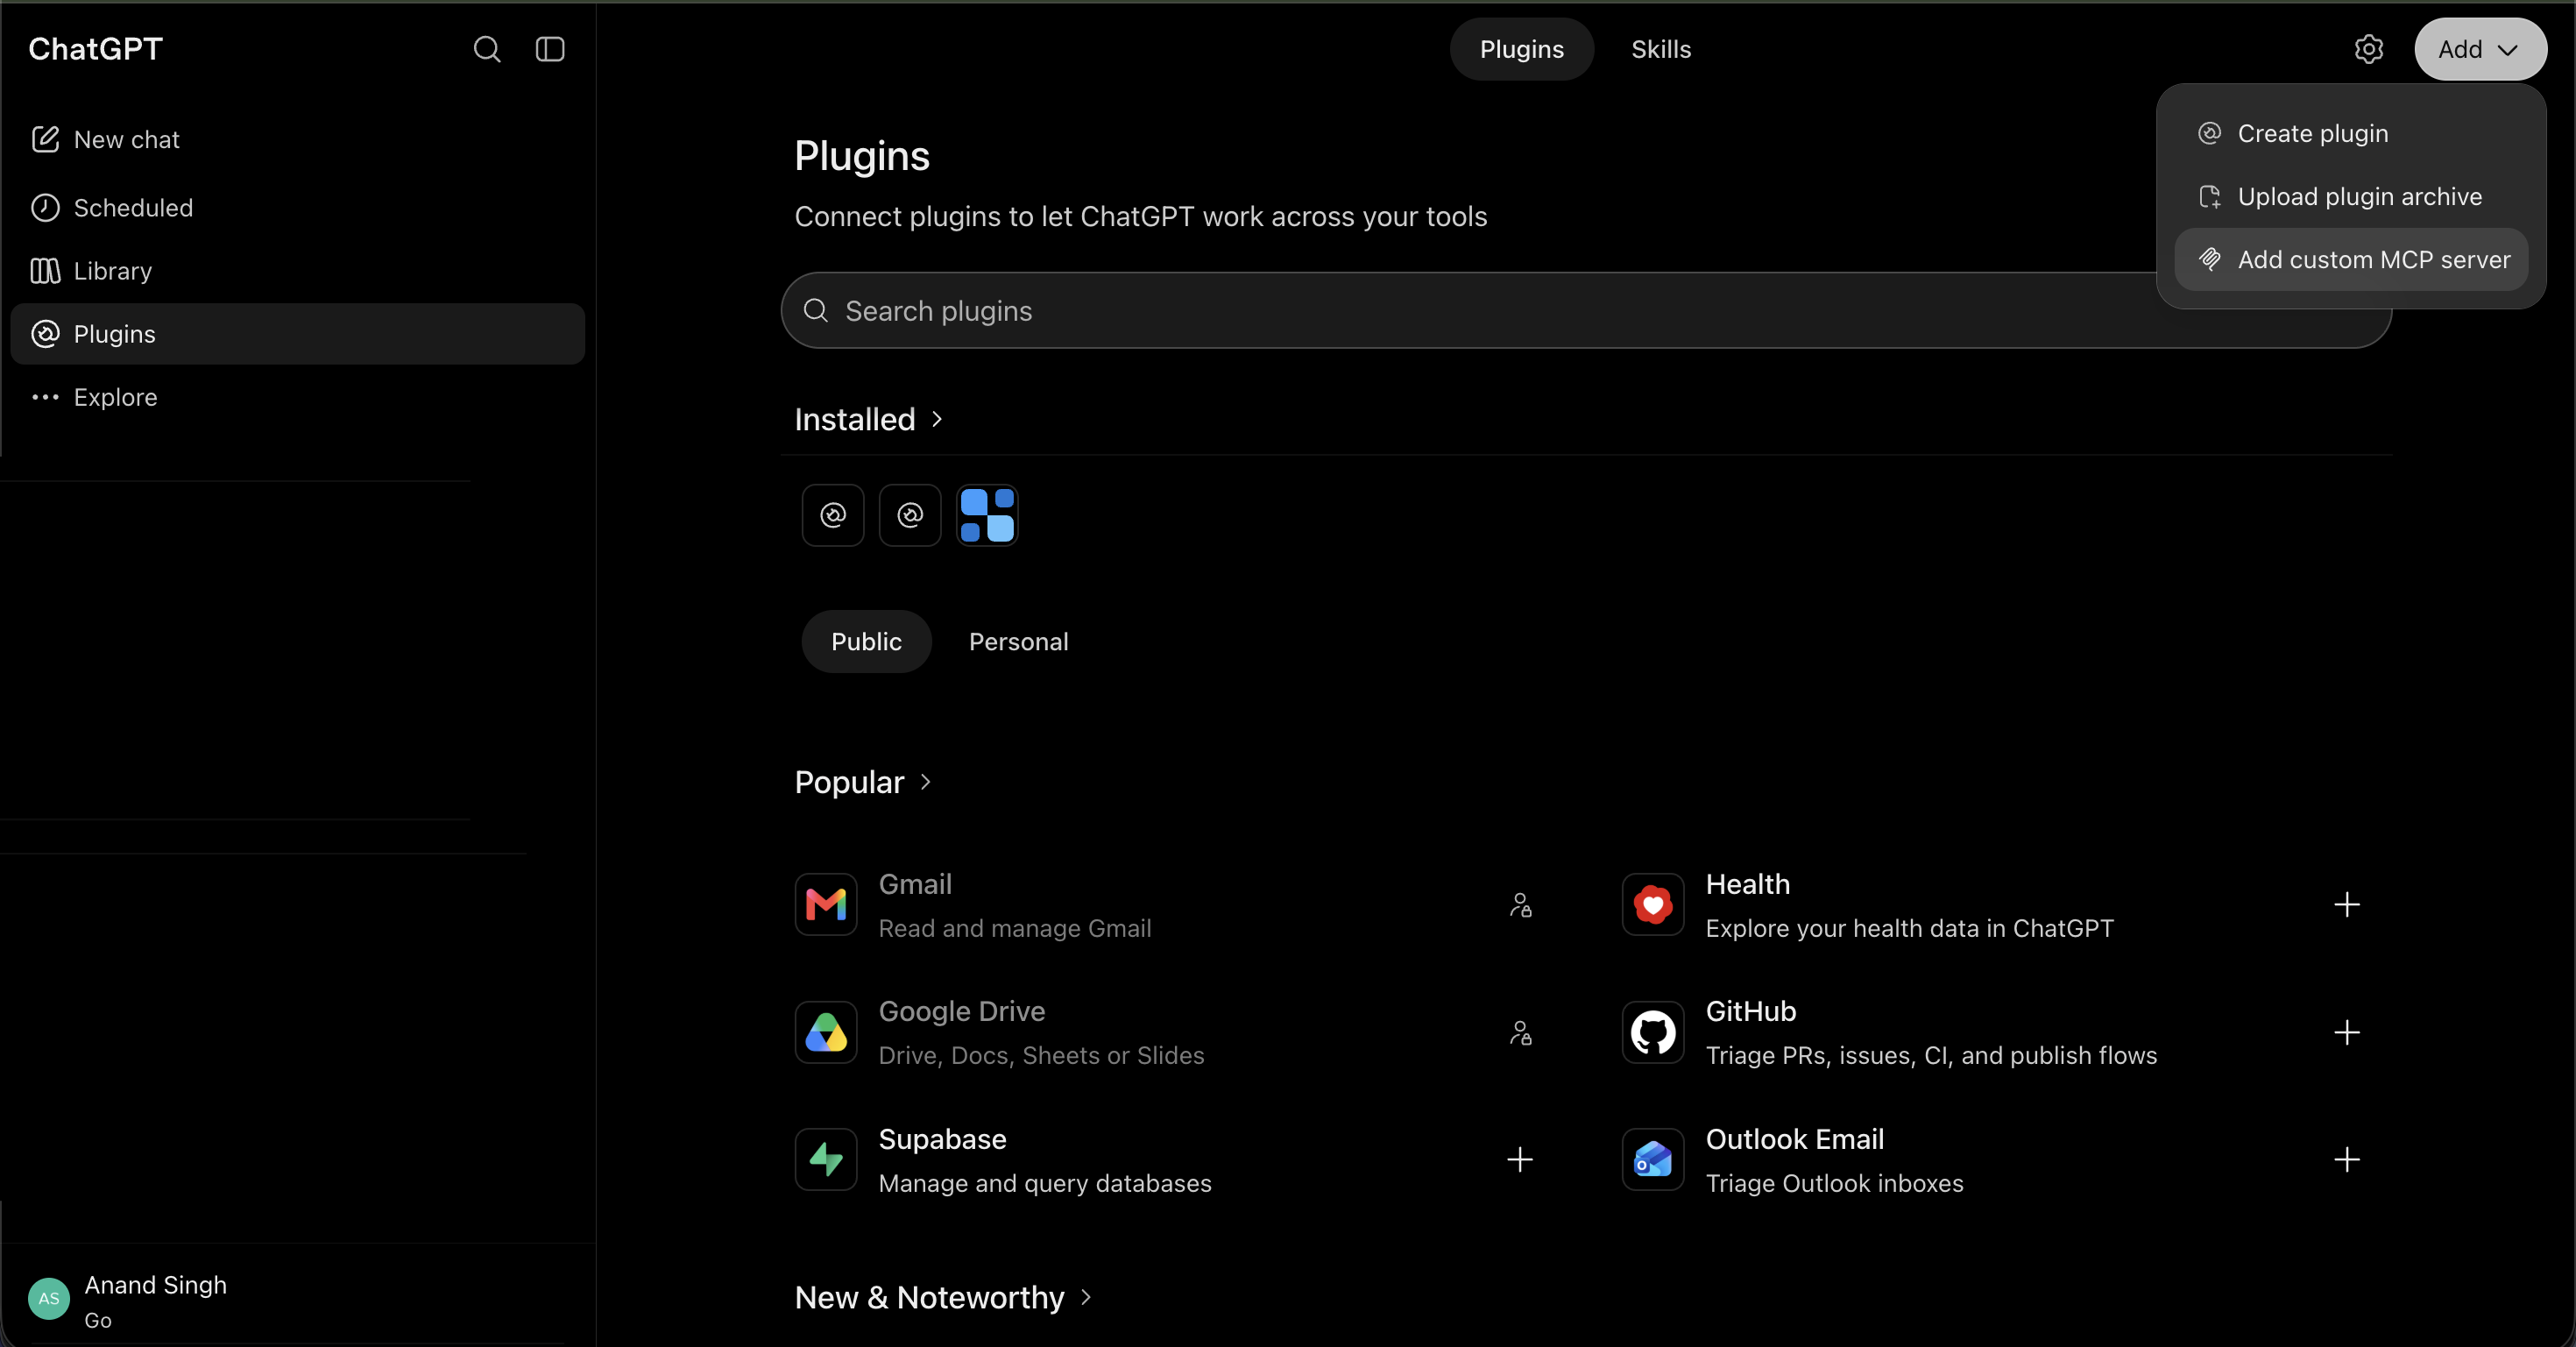
- Add a custom MCP server
Click Add in the top right, then choose Add custom MCP server.
- Point it at Pie.host
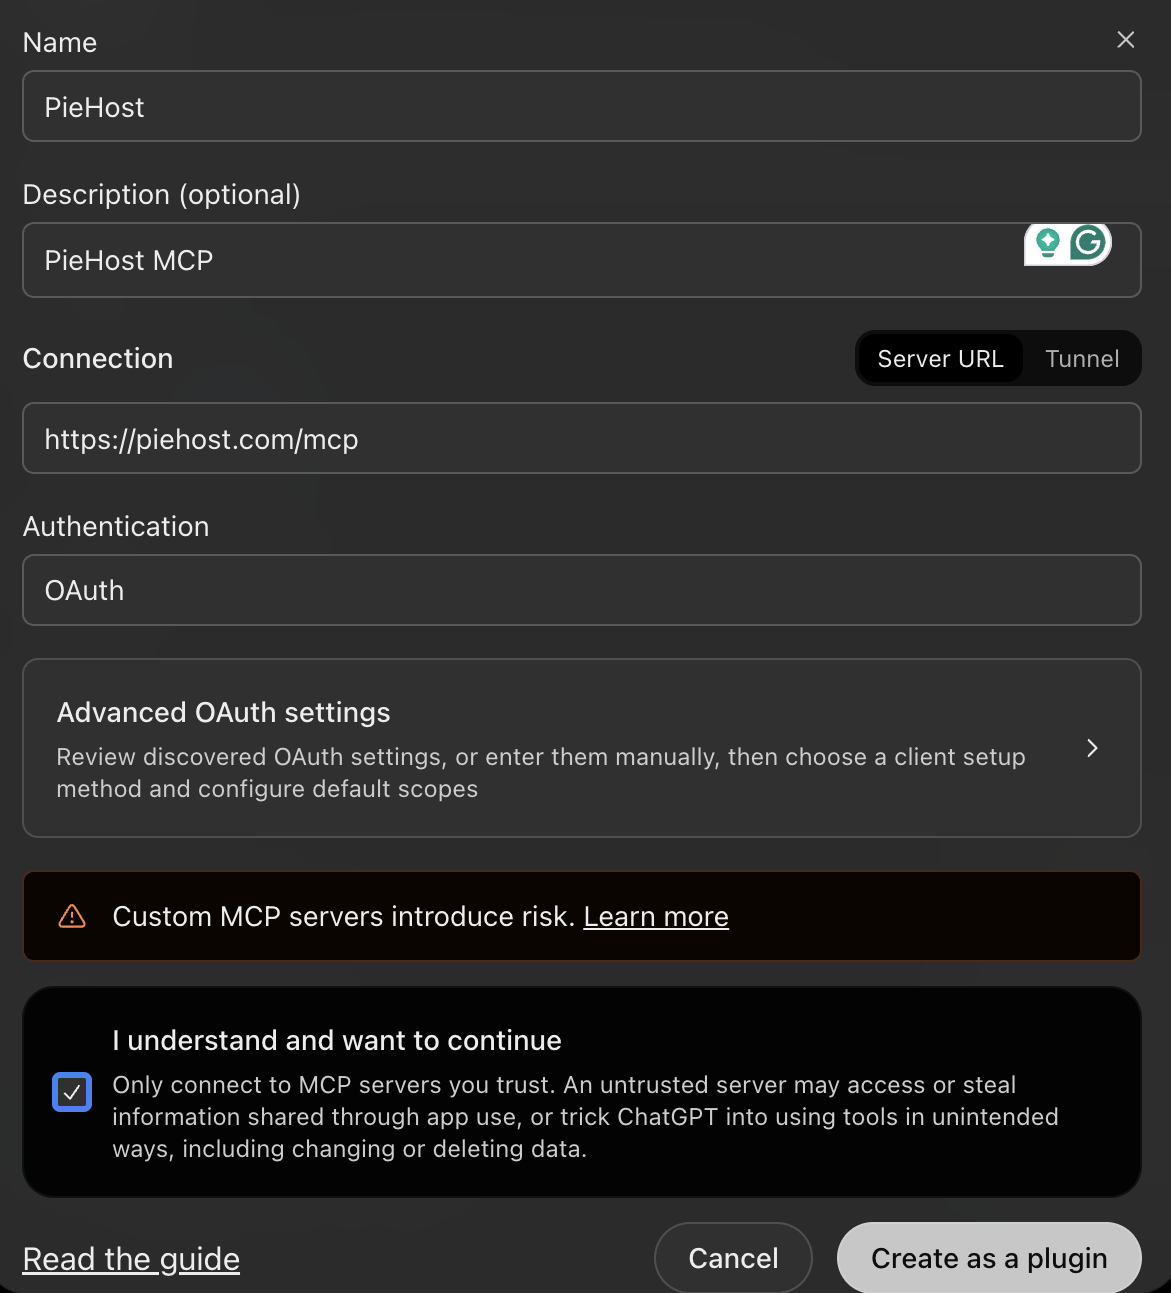
Fill in the form:
- Name:
PieHost - Description:
PieHost MCP - Connection: Server URL, set to
https://piehost.com/mcp - Authentication:
OAuth
Check "I understand and want to continue", then click Create as a plugin.
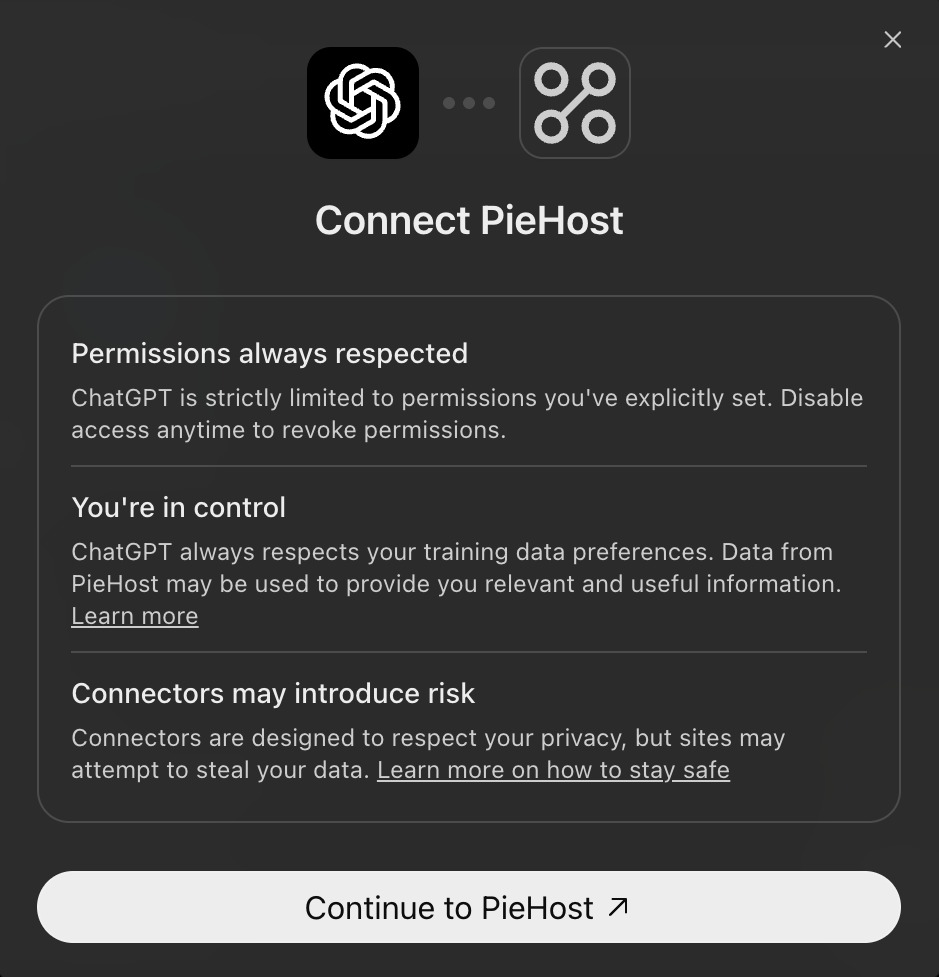
- Connect your account
ChatGPT shows a consent screen explaining what the connector can access. Click Continue to PieHost.
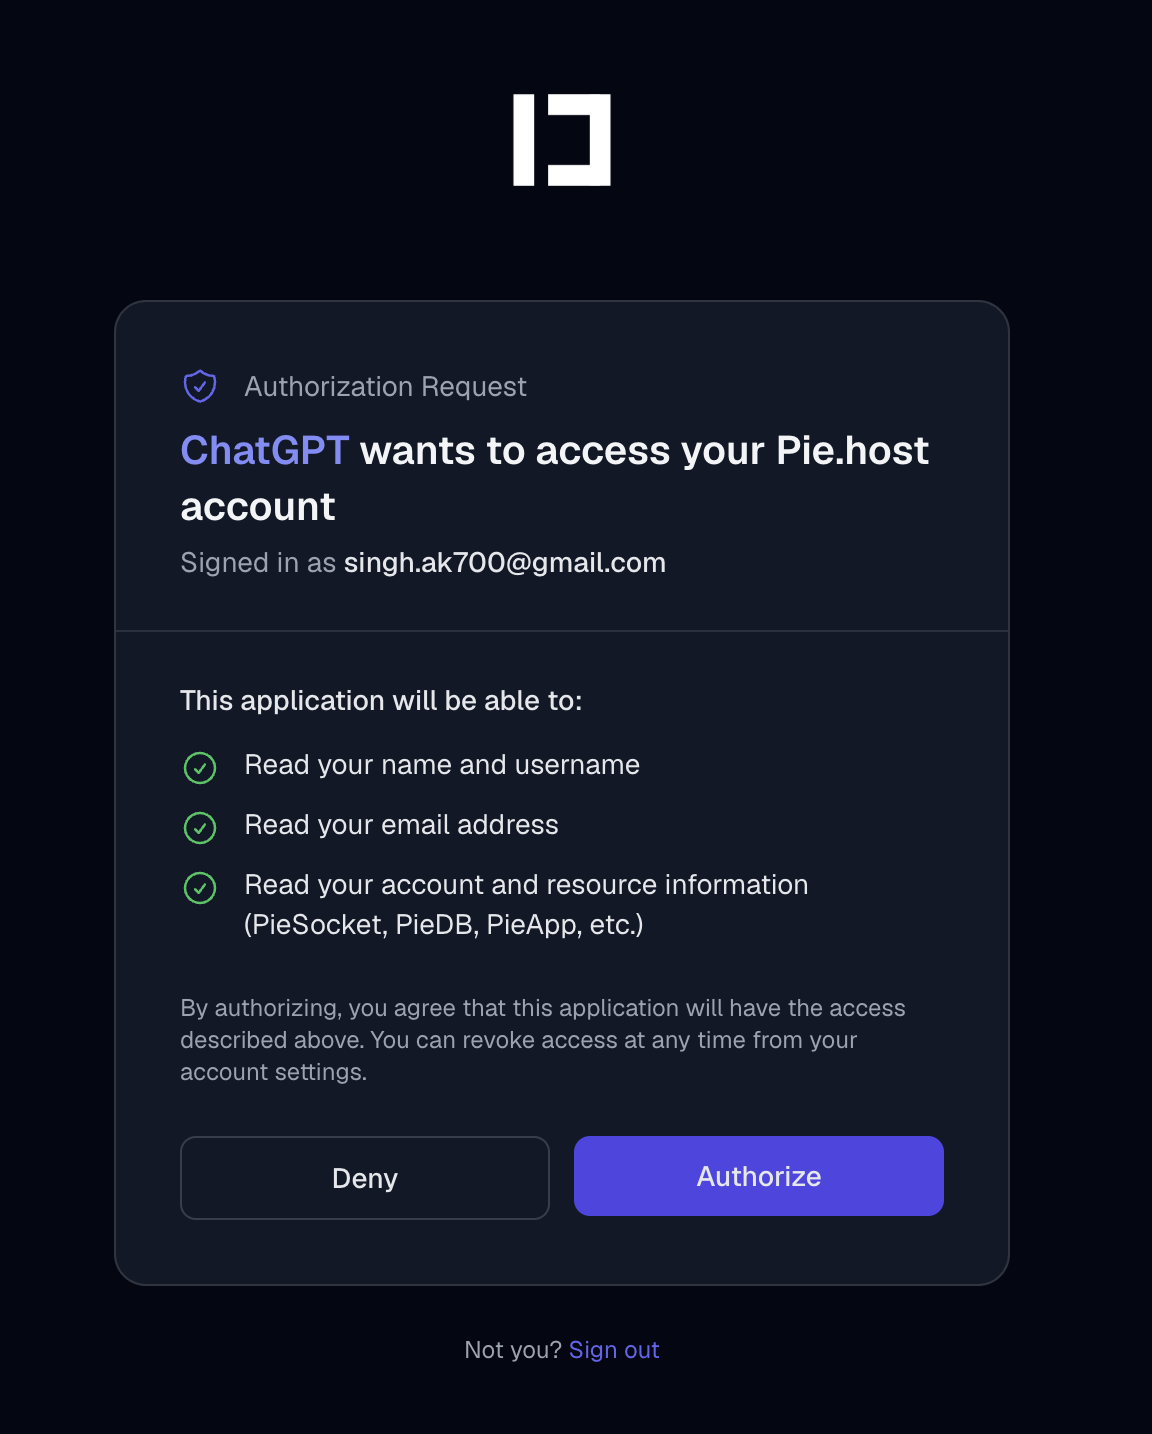
- Authorize on Pie.host
You'll be redirected to Pie.host to sign in (if you aren't already) and approve the request. ChatGPT asks to read your name, email, and your account/resource information (PieSocket, PieDB, PieApp, etc.). Click Authorize.
That's it, PieHost now shows up as an installed connector. You can ask ChatGPT things like "list my PieSocket clusters" or "what's the status of my PieDB instance" and it'll call the MCP server on your behalf.
See the MCP server docs for the full list of tools it exposes, what each one returns, and what data ChatGPT can and can't access.
You can revoke access at any time from your Pie.host connected apps settings or from ChatGPT's connector settings.