
Rabikant
Nov 23, 2024
Getting Started with HTML5 WebSocket
Lets learn how to use WebSocket in HTML5
What is WebSocket?
WebSockets define a technology for real time interaction, between a web browser and the client (which commonly is another browser), and the server. Whereas, with HTTP requests, the communication is one way; there is only a single request made by the client and the presence of WebSockets enables a two-way communication between the client and the server.
What you need
A web server (e.g., Apache, Nginx, or Node.js) A WebSocket-compatible browser (e.g., Google Chrome, Mozilla Firefox, or Microsoft Edge) A text editor or IDE (e.g., Sublime Text, Visual Studio Code, or Atom) Create a WebSocket Server:
For this example, we'll use Node.js and the ws library to create a WebSocket server.
Install Node.js if you haven't already. Create a new folder for your project and navigate into it. Run npm init to create a package.json file. Install the ws library by running :
npm install ws
HTML Structure
<!DOCTYPE html>
<html>
<head>
<title>WebSocket Chat</title>
<style>
<!-- CSS styles here -->
</style>
</head>
<body>
<h1>WebSocket Chat</h1>
<div id="chat-log"></div>
<div id="messageDiv">
<input id="message" type="text" placeholder="Type a message...">
<button id="send">Send</button>
</div>
<script>
<!-- JavaScript code here -->
</script>
</body>
</html>
These are the minimal tags of the HTML structure of the page. We have our title in
tag, a
with class “chat-log ” for the actual chat messages, and a
with an id of “messageDiv” for the input area and the send button.
CSS Styles
body {
font-family: Arial, sans-serif;
background-color: #f0f0f0;
}
#chat-log {
width: 80%;
margin: 20px auto;
padding: 20px;
border: 1px solid #ccc;
border-radius: 10px;
background-color: #fff;
box-shadow: 0 0 10px rgba(0, 0, 0, 0.1);
}
#chat-log li {
margin-bottom: 10px;
padding: 10px;
border-bottom: 1px solid #ccc;
}
#chat-log li:last-child {
border-bottom: none;
}
#message {
width: 60%;
padding: 10px;
font-size: 16px;
border: 1px solid #ccc;
border-radius: 10px;
}
#send {
padding: 10px 20px;
border: none;
border-radius: 10px;
background-color: #4CAF50;
color: #fff;
cursor: pointer;
}
#send:hover {
background-color: #3e8e41;
}
.chat-message {
padding: 10px;

border-bottom: 1px solid #ccc;
}
.chat-message img {
width: 20px;
height: 20px;
border-radius: 50%;
margin-right: 10px;
}
.chat-message .username {
font-weight: bold;
color: #337ab7;
}
.chat-message .message-text {
color: #666;
}
#messageDiv {
display: flex;
justify-content: center;
}
These are the styles for the page. We’re selecting the element, the
element with chat-log id, the element with an attribute id=”message”, with an attribute id=”send” and the last
element that has an id attribute named “messageDiv”.
JavaScript Code
 const socket = new WebSocket("ws://localhost:8080");

    socket.onopen = () => {
      console.log("Connected to the WebSocket server");
    };

    socket.onmessage = (event) => {
      const message = event.data;
      if (message instanceof Blob) {
        handleBlobMessage(message);
      } else {
        console.log(`Received non-Blob message: ${message}`);
      }
    };

    async function handleBlobMessage(blob) {
      const messageString = await blob.text();
      console.log(`Received message => ${messageString}`);
      document.getElementById("chat-log").innerHTML += `<div>${messageString}</div>`;
    }
    socket.onerror = (event) => {
      console.log("Error occurred while communicating with the WebSocket server");
    };

    socket.onclose = () => {
      console.log("Disconnected from the WebSocket server");
    };

    document.getElementById("send").addEventListener("click", () => {
      const message = document.getElementById("message").value;
      if (message !== "") {
        socket.send(message);
        document.getElementById("message").value = "";
      }
    });
This is the control logic that sets up the WebSocket and returns the chat function. A new WebSocket object is created and event listeners for the open, message, error, and close events are set up. We also define an async function handleBlobMessage to parse Blob messages that will be received. Last but not the least, an event listener is attached to the ‘send’ button through which the input message is forwarded to WebSocket server, if provided.
Create a new file called server.js and add the following code:
const WebSocket = require("ws");
const wss = new WebSocket.Server({ port: 8080 });

wss.on("connection", (ws) => {
    console.log("Client connected");

    ws.on("message", (message) => {
        console.log(`Received message: ${message}`);
        broadcast(message);
    });

    ws.on("close", () => {
        console.log("Client disconnected");
    });
});

function broadcast(message) {
    wss.clients.forEach((client) => {
        if (client.readyState === WebSocket.OPEN) {
            client.send(message);
        }
    });
}

console.log("WebSocket server started on port 8080");
A client (e. g. , a web browser) opens a WebSocket connection employing the ws protocol.
A connection is made by a server to the client and a connection event is fired.
The client transmits a message to the server; the latter generates a message event.
The received message is saved and the broadcast function is activated by providing the message to it.
The broadcast function transmits the message to all the clients that are connected and are in a position to receive messages.
When a client opts out from a server, the server sends close event and prints out a message on the console.
This is the client file, add this code to index.html.
<!DOCTYPE html>
<html>
<head>
<title>WebSocket Chat</title>
<style>
body {
font-family: Arial, sans-serif;
background-color: #f0f0f0;
}


#chat-log {
width: 80%;
margin: 20px auto;
padding: 20px;
border: 1px solid #ccc;
border-radius: 10px;
background-color: #fff;
box-shadow: 0 0 10px rgba(0, 0, 0, 0.1);
}


#chat-log li {
margin-bottom: 10px;
padding: 10px;
border-bottom: 1px solid #ccc;
}


#chat-log li:last-child {
border-bottom: none;
}


#message {
width: 60%;
padding: 10px;
font-size: 16px;
border: 1px solid #ccc;
border-radius: 10px;
}


#send {
padding: 10px 20px;
border: none;
border-radius: 10px;
background-color: #4CAF50;
color: #fff;
cursor: pointer;
}


#send:hover {
background-color: #3e8e41;
}


.chat-message {
padding: 10px;
border-bottom: 1px solid #ccc;
}


.chat-message img {
width: 20px;
height: 20px;
border-radius: 50%;
margin-right: 10px;
}


.chat-message .username {
font-weight: bold;
color: #337ab7;
}


.chat-message .message-text {
color: #666;
}


#messageDiv {
display: flex;
justify-content: center;
}
</style>
</head>


<body>
<h1>WebSocket Chat</h1>


<div id="chat-log"></div>
<div id="messageDiv">
<input id="message" type="text" placeholder="Type a message...">
<button id="send">Send</button>
</div>


<script>
const socket = new WebSocket("ws://localhost:8080");


socket.onopen = () => {
console.log("Connected to the WebSocket server");
};


socket.onmessage = (event) => {
const message = event.data;
if (message instanceof Blob) {
handleBlobMessage(message);
} else {
console.log(`Received non-Blob message: ${message}`);
}
};


async function handleBlobMessage(blob) {
const messageString = await blob.text();
console.log(`Received message => ${messageString}`);
document.getElementById("chat-log").innerHTML += `<div>${messageString}</div>`;
}
socket.onerror = (event) => {
console.log("Error occurred while communicating with the WebSocket server");
};


socket.onclose = () => {
console.log("Disconnected from the WebSocket server");
};


document.getElementById("send").addEventListener("click", () => {
const message = document.getElementById("message").value;
if (message !== "") {
socket.send(message);
document.getElementById("message").value = "";
}
});
</script>
</body>
</html>
Run the Server and Test the WebSocket:
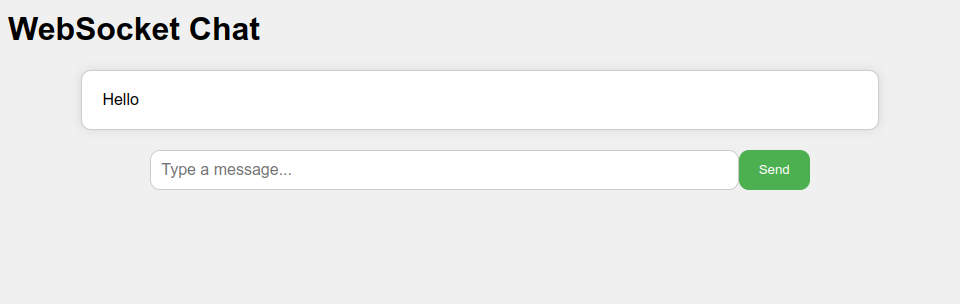
Run the server by executing node server.js in your terminal. Open index.html in a WebSocket-compatible browser. Enter a message in the text input and click the send button. Observe the message being sent to the server and echoed back to the client. Congratulations! You've successfully set up a WebSocket connection between a client and a server. This is just the beginning of building real-time web applications with HTML5 WebSocket.
Run the server by typing, ‘node server.js’ in the terminal.
Open index.html in a browser supporting WebSockets – it allows to transfer JSON data to the browser via WebSocket and then process it with JavaScript.
Type a message in the message box and then click on the send button.
Notice what is passed to the server and shown to the client message after the transmission.
Congratulations! You are done with creating a WebSocket between a client and a server. This is just the beginning of building real time web applications with HTML5 WebSocket.
Complete Code
The project is available on our GitHub : https://github.com/piehostHQ/html-ws