
Rabikant
Nov 19, 2024
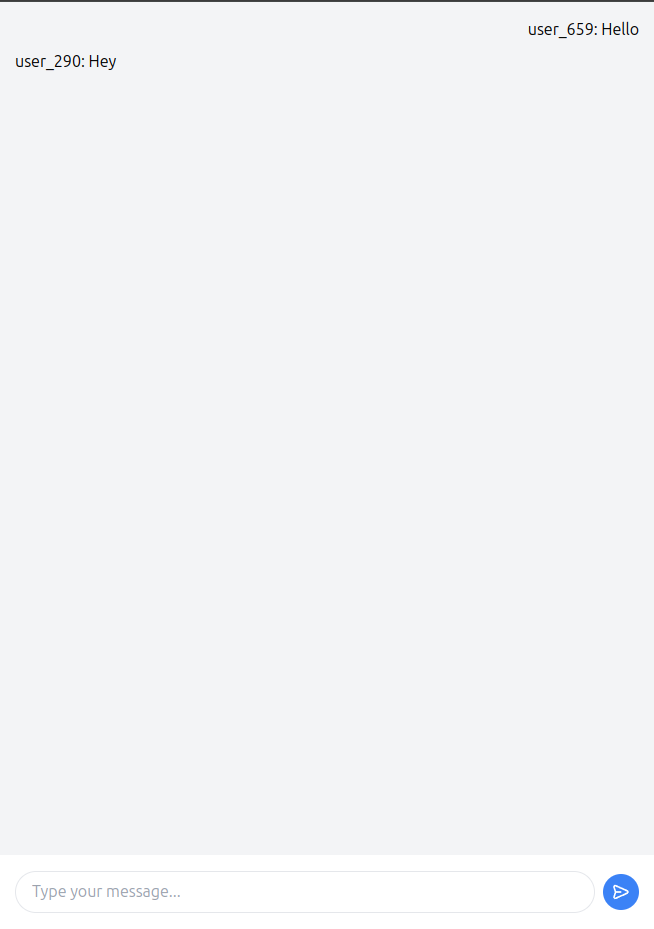
Laravel and WebSocket - Build a realtime chat application.
Lets learn How to use websocket in Laravel to make a chat app
What is Laravel?
A free PHP web framework named Laravel is available from Taylor Otwell, aimed for the creation of model–view–controller (MVC) based web applications. Laravel was built on Symfony's components and it shows the strong inspiration from Ruby on Rails. An expressive and elegant syntax is introduced with Laravel that allows developing tasks in a clean manner: highly flexible and modifiable. Some features of Laravel:
Eloquent ORM (Object-Relational Mapping) system, it speaks in a gentle manner and guides you to the depths of database interaction. Blade templating engine, an artist with his simple yet flexible strokes that bring views to life. Middleware, a gatekeeper standing at the entrance filtering all incoming HTTP requests. Routing system, like a choreographer teaching flexibility and expressiveness in dances. Authentication and authorization made native. Events lead when programming is the follower. Extensive scriptures to refer for enlightenment— all backed by a community bustling with life. Laravel is engineered for the purpose of facilitating development work with ease and speed, it has more significance in producing a big — and expandable — web applications that are intricate. It is commonly used in web application development due to its simplicity, flexibility, and user-friendliness.
Start with creating a Laravel app with following command:
composer create-project laravel/laravel example-app
Navigate to the application directory:
cd example-app
We will be using tailwind for our css so install that from here
The form element
<form id="form" class="bg-gray-100 h-screen flex flex-col max-w-lg mx-auto">
   {{-- Your Code --}}
</form>
This code snippet features a form element identified by the ID "form" that is styled using classes such as bg-gray-100, h-screen, flex, flex-col, max-w-lg, and mx-auto. The origin of these classes can be traced back to popular CSS frameworks such as Tailwind CSS.
The chat message container
  <div class="flex-1 overflow-y-auto p-4">
  <div class="flex flex-col space-y-2">
In this case, we have a container component that has flex-1 and overflow-y-auto classes thus allowing it to take up the full screen height as well as scrolling vertically. In here, there is another container with flex and flex-col styles to hold the chat messages. The class space-y-2 makes every of these posts have a little space between them.
The my-messages container
<div class="flex justify-end">
                    <div id="my-messages" class="text-black" >
                        <div ></div>
                    </div>
</div>
As here, we have the container div element with classes flex and justify-end, thus the content is right justified. Within this container, The The #my-messages will include messages of the current user.
The others-messages container
<div class="flex">
                    <div id="others-messages" class="text-black" >
                        <div ></div>
                    </div>
</div>
Here we have another container div that has classes flex. The #others-messages element will store all the messages that were posted by the rest of the users.
The input field and submit button
<div class="bg-white p-4 flex items-center">
            <input type="text" placeholder="Type your message..." id="input"
                class="flex-1 border rounded-full px-4 py-2 focus:outline-none">
            <button type="submit"
                class="bg-blue-500 text-white rounded-full p-2 ml-2 hover:bg-blue-600 focus:outline-none">
                <svg width="20px" height="20px" viewBox="0 0 24 24" fill="none" xmlns="<http://www.w3.org/2000/svg>"
                    stroke="#ffffff">
                    <g id="SVGRepo_bgCarrier" stroke-width="0"></g>
                    <g id="SVGRepo_tracerCarrier" stroke-linecap="round" stroke-linejoin="round"></g>
                    <g id="SVGRepo_iconCarrier">
                        <path
                            d="M11.5003 12H5.41872M5.24634 12.7972L4.24158 15.7986C3.69128 17.4424 3.41613 18.2643 3.61359 18.7704C3.78506 19.21 4.15335 19.5432 4.6078 19.6701C5.13111 19.8161 5.92151 19.4604 7.50231 18.7491L17.6367 14.1886C19.1797 13.4942 19.9512 13.1471 20.1896 12.6648C20.3968 12.2458 20.3968 11.7541 20.1896 11.3351C19.9512 10.8529 19.1797 10.5057 17.6367 9.81135L7.48483 5.24303C5.90879 4.53382 5.12078 4.17921 4.59799 4.32468C4.14397 4.45101 3.77572 4.78336 3.60365 5.22209C3.40551 5.72728 3.67772 6.54741 4.22215 8.18767L5.24829 11.2793C5.34179 11.561 5.38855 11.7019 5.407 11.8459C5.42338 11.9738 5.42321 12.1032 5.40651 12.231C5.38768 12.375 5.34057 12.5157 5.24634 12.7972Z"
                            stroke="#ffffff" stroke-width="2" stroke-linecap="round" stroke-linejoin="round"></path>
                    </g>
                </svg>
            </button>
</div>
Here we have a container div with bg-white, p-4, flex, and items-center classes that defines the container with a white background, having 4 pixels padding and the content is centered horizontally. And within this we have an HTML5 input field with the attribute id of “input” and an HTML5 button type of submit. Specifically, the input field has the classes of flex-1 which makes it full width, the classes of border and rounded-full which gives the input field a border with rounded corners, and other classes such as px-4 and py-2 that style it with 4px of padding on all sides. The button has classes given as bg-blue-500, text-white, rounded-full, p-2 and, ml-2 that give the button a blue hue with white text and rounded edges. The hover:In the same way that :hover directive affects the color of the text to white when the mouse is over the button, the use of background : bg-blue-600 in the button changes the background color of the button to a darker blue. Inside the button, the SVG icon is an arrow icon which most probably has been put for conveying the message sending functionality.
Getting elements and setting up variables
  const input = document.getElementById('input');
        var username = "user_" + (Math.floor(Math.random() * 1000));
        var chatOne = document.getElementById('chatOne');
        var chatTwo = document.getElementById('chatTwo');
        var form = document.getElementById('form');
Here, we see the use of the document to get references to several HTML elements. getElementById`. We’re also generating a random username as we use a string ‘user_’ along with a random number between 0 to 999.
Setting up the PieSocket instance
       var piesocket = new PieSocket.default({
            clusterId: "Your API_Key",
            apiKey: "Your Cluster_Id",
            notifySelf: true,
            presence: true,
        });
In the following example, which is used for WebSocket communications, we are instantiating a class called PieSocket. We're passing in some configuration options:We're passing in some configuration options:
- clusterId: The ID of the cluster of PieSockets we want to connect our application to
- apiKey: the information concerning our API key of the PieSocket cluster
- notifySelf: :Send a notification to ourselves when sending a message? (option true)
- presence: which /whether to track user presence (true)
Subscribing to the chat room and setting up event listeners
piesocket.subscribe("chat-room").then(ch => {
            channel = ch;

            channel.listen("system:member_joined", function(data) {
                if (data.member.user == username) {
                    data.member.user = "<b>You</b>";
                    chatOne.insertAdjacentHTML('afterend',
                        `<div> ${data.member.user} joined the chat<div>`);
                } else {
                    chatTwo.insertAdjacentHTML('afterend',
                        `<div> ${data.member.user} joined the chat<div>`);
                }

            })

            channel.listen("new_message", function(data, meta) {
                const messageElement = document.createElement('div');
                messageElement.innerHTML = `${data.sender}: ${data.text}`;
                if (data.sender == username) {
                  <form id="form" class="bg-gray-100 h-screen flex flex-col max-w-lg mx-auto">
      document.getElementById('my-messages').appendChild(messageElement);
                } else {
                    document.getElementById('others-messages').appendChild(messageElement);
                }
            })
        });
Here we are joining a bare PieSocket channel named “chat-room”. Once we're connected, we're setting up two event listeners:Once we're connected, we're setting up two event listeners:
- One for the "system:One of them is the “member_joined” event, which will be initiated every time a new user waeschtm join the chat room.
- Before the new_message event which is called every time a new message is sent in the chat room.
Ending a message
  function sendMessage(e) {
            e.preventDefault();

            if (!channel) {
                alert("Channel is not connected yet, wait a sec");
                return;
            }

            var message = document.getElementById('input').value;

            channel.publish("new_message", {
                sender: username,
                text: message
            });
        }
Here, we’re defining an event selector that would trigger whenever the form gets submitted. On the _submit event, the sendMessage function is triggered after the form has been submitted. This function:
- : Stops the page from autosubmitting whenever the Return key is pressed on the last cell of a row.
- The program establishes whether the channel is active before sending a message.
- Retrieves the value of the particular text input that has been added to the form.
- Subscribes to the “new_message” event and then publishes that event with the username of the sender appended to the message text.
Complete code for the project:
<!DOCTYPE html>
<html lang="en">

<head>
    <meta charset="UTF-8">
    <meta name="viewport" content="width=device-width, initial-scale=1.0">
    <meta http-equiv="X-UA-Compatible" content="ie=edge">
    <title>Document</title>
    <script src="https://unpkg.com/piesocket-js@5"></script>
</head>

<body>

    @vite('resources/css/app.css')

    <form id="form" class="bg-gray-100 h-screen flex flex-col ">

        <div class="flex-1 overflow-y-auto p-4">
            <div class="flex flex-col space-y-2 ">
                <div class="flex justify-end">
                    <div id="my-messages" class="text-black " >
                        <div ></div>
                    </div>
                </div>

                <div class="flex  justify-start">
                    <div id="others-messages" class="text-black w-full" >
                        <div ></div>
                    </div>
                </div>
            </div>
        </div>

        <div class="bg-white p-4 flex items-center">
            <input type="text" placeholder="Type your message..." id="input" autocomplete="off"
                class="flex-1 border rounded-full px-4 py-2 focus:outline-none">
            <button type="submit"
                class="bg-blue-500 text-white rounded-full p-2 ml-2 hover:bg-blue-600 focus:outline-none">
                <svg width="20px" height="20px" viewBox="0 0 24 24" fill="none" xmlns="http://www.w3.org/2000/svg"
                    stroke="#ffffff">
                    <g id="SVGRepo_bgCarrier" stroke-width="0"></g>
                    <g id="SVGRepo_tracerCarrier" stroke-linecap="round" stroke-linejoin="round"></g>
                    <g id="SVGRepo_iconCarrier">
                        <path
                            d="M11.5003 12H5.41872M5.24634 12.7972L4.24158 15.7986C3.69128 17.4424 3.41613 18.2643 3.61359 18.7704C3.78506 19.21 4.15335 19.5432 4.6078 19.6701C5.13111 19.8161 5.92151 19.4604 7.50231 18.7491L17.6367 14.1886C19.1797 13.4942 19.9512 13.1471 20.1896 12.6648C20.3968 12.2458 20.3968 11.7541 20.1896 11.3351C19.9512 10.8529 19.1797 10.5057 17.6367 9.81135L7.48483 5.24303C5.90879 4.53382 5.12078 4.17921 4.59799 4.32468C4.14397 4.45101 3.77572 4.78336 3.60365 5.22209C3.40551 5.72728 3.67772 6.54741 4.22215 8.18767L5.24829 11.2793C5.34179 11.561 5.38855 11.7019 5.407 11.8459C5.42338 11.9738 5.42321 12.1032 5.40651 12.231C5.38768 12.375 5.34057 12.5157 5.24634 12.7972Z"
                            stroke="#ffffff" stroke-width="2" stroke-linecap="round" stroke-linejoin="round"></path>
                    </g>
                </svg>
            </button>
        </div>

    </form>

    <script>
        const input = document.getElementById('input');
        var username = "user_" + (Math.floor(Math.random() * 1000));
        var form = document.getElementById('form');
        form.addEventListener("submit", sendMessage);

        var piesocket = new PieSocket.default({
            clusterId: "free.blr2",
            apiKey: "B9UKgvptNTWrZxfCUTquFp7nKVsYqu2LtmBao5Jg",
            notifySelf: true,
            presence: true,
        });


        var channel;
        piesocket.subscribe("chat-room").then(ch => {
            channel = ch;

            channel.listen("system:member_joined", function(data) {
                // if (data.member.user == username) {
                //     data.member.user = "<b>You</b>";
                //     document.getElementById('my-messages').insertAdjacentHTML('afterend',
                //         `<div> ${data.member.user} joined the chat<div>`);
                // } else {
                //     document.getElementById('others-messages').insertAdjacentHTML('afterend',
                //         `<div> ${data.member.user} joined the chat<div>`);
                // }

            })

            channel.listen("new_message", function(data, meta) {
                const messageElement = document.createElement('div');
                messageElement.innerHTML = `${data.sender}: ${data.text}`;
                if (data.sender == username) {
                    document.getElementById('my-messages').appendChild(messageElement);
                } else {
                    document.getElementById('others-messages').appendChild(messageElement);
                }
            })
        });


        function sendMessage(e) {
            e.preventDefault();

            if (!channel) {
                alert("Channel is not connected yet, wait a sec");
                return;
            }

            var message = document.getElementById('input').value;

            channel.publish("new_message", {
                sender: username,
                text: message
            });
            document.getElementById('input').value = '';
        }
    </script>

</body>

</html>
You can run the app with :
php artisan serve
Complete Code
The project is available on our GitHub : https://github.com/piehostHQ/laravel-ws-chat