
kobete
Nov 19, 2024
How to make a collaborative document app with WebSocket.
Lets make a collabrative document app with piesocket
What is a collaborative document?
A collaborative document is a file on which many different people can also write and work together to produce one single document. A collaborative document might be textual documents/word processing, PDFs, presentation or a spread sheet.
Collaborative document management can therefore mean being able to store, index, distribute and share documents and indeed work on the very documents in a single area that can be accessed by the permitted individuals irrespective of their geographical location. Which allows the members of the same team to work on the same project at once, doing changes simultaneously. Some of the tools now used in collaborative document include for instance the MS word and Google Docs.
Prerequisites:
- Vue.js: This is a powerful JavaScript framework for creating user interfaces. The application you are creating is a Vue.js application, so you need to install Vue.js and understand its basic concepts, such as components, reference files, and instructions.
- PieSocket: This is an instant messaging service used for instant messaging functionality in applications. You need to have a PieSocket account and know how to use the JavaScript SDK to subscribe to channels and send/receive messages.
- JavaScript (ES6): The application uses modern JavaScript (ES6) features such as arrow functions and Rules. You must have a good understanding of JavaScript and these features.
- CSS: The application uses CSS to create its objects. You need to know how to write and use CSS styles.
- HTML: The model of the application's user interface is defined using HTML. You need to know how to create web pages using HTML.
- Text Editor or IDE: To write code, you need a text editor or development environment (IDE). Examples include Visual Studio Code, Atom or Sublime Text.
- Web Browser: You will need a modern web browser to test and complete your application. For example, Google Chrome, Mozilla Firefox or Microsoft Edge.
- Node.js and npm: Vue.js and its related packages are typically installed and managed by npm, the Node.js package manager. You need to install Node.js and npm.
- Vue CLI (optional): This is a command line tool for creating Vue.js applications. This is not necessary, but can make your Vue.js project easier to set up and manage.
What is NPM?
NPM or Node package manager is a free and open source software registry and package manager, it is a place where developers can manage their code packages. It is the package manager for Node JavaScript platform. Its main use is creating, publishing, discovering and installing Node.js programs. We use npm in a CLI to diownload and install software.
How to install NPM on Ubuntu
First update the package index on Ubuntu with:
sudo apt update
Install Node.js and NPM with following command:
sudo apt install nodejs npm
Check the NPM Version:
npm —version
Let's start by creating a Vue app by running the following code in the terminal.
npm create vue@latest
Name your Vue app and configure it however you like.
Then cd into your vue app folder.
cd vue-example-app
We need to install some dependencies to run our Vue app.
npm install
We are using Tailwind for our CSS if you want to install Tailwind into your Vue app. You can the instructions here.
We need to install Piesocketjs for our Vue app.
npm i piesocket-js@5
We need to make a account on Piehost.com and get api key and cluster id to use PieSocket in our project
const pieSocket = new PieSocket({
  clusterId: "Your_ClusterID",
  apiKey: "Your_API_Key",
});
This code is producing a brand-new object named PieSocket. It’s a framework for streaming data in real-time. The following parameters are passed into this method:
clusterId: It is the unique identifier of the cluster to which you will connect.
apiKey, this is your exclusive API key, which helps to authenticate your application with the PieSocket service. Make sure you don’t share this key with anyone else because if anybody has it at hand, they may log in and get hold of your account as well.
After the initialization of the PieSocket object, you are enabled to call it and subscribe to channels and send or get real-time information about the message. These capabilities are valuable, especially in building applications that need live updates such as chat apps and collaborative editing tools. Be careful to keep your apiKey safe and not to make it accessible publicly.
let text = ref("");
pieSocket.subscribe("text-room").then((ch) => {
  channel = ch;
  channel.listen("move", (data) => {
    let receivedData = JSON.parse(data);
    if (receivedData.text !== text.value) {
      text.value = receivedData.text;
    }
  });
});
This is a code subset of Vue. a js application that connects with the PieSocket service for purposes of real time communication. Here’s a breakdown:
The line of code let text = ref(""); creates a reactive reference using the ref of Vue.js with name text. The symbol text is then bind with an empty string. By running out this line of code: pieSocket. subscribe("text-room"). Then we use then(() => {. .. }) and subscribe to channel named “text-room”. It makes use of a callback function that gets started with the subscribed channel as the parameter and this in turn sets the channel as the channel variable. channel. listen("move", (data) => {. .. });: This line of code sets up a listener on the channel for the “move”event . If such an event shows up it will be passed then the called with the said event along with the event data as a parameter. After the event data has been parsed out from the JSON format and after the parsed data went back to the JavaScript object from that callback function, it is the right time for making comparison between ‘text’ of the returned data and ‘text’ of ref variable for the purpose of replacing present value of ‘text’ with a new one.
Template
<template>
<div id="app">
<textarea v-model="text" placeholder="Start writing..."></textarea>
<button @click="updateText">Update</button>
</div>
</template>
This is the template part of the Vue component. It defines the HTML structure of the component. In this case, we have:
A div element with an ID of "app" A textarea element with a v-model directive bound to the text variable. This allows the user to type in the textarea and updates the text variable accordingly. A button element with an @click event handler that calls the updateText function when clicked.
Script Setup
<script setup>
import { ref, watch, onMounted } from "vue";
import PieSocket from "piesocket-js";
const pieSocket = new PieSocket({
clusterId: "free.blr2",
apiKey: "B9UKgvptNTWrZxfCUTquFp7nKVsYqu2LtmBao5Jg"
});
This is the script setup part of the Vue component. We import the necessary dependencies from Vue and PieSocket, and create a new instance of PieSocket with our API key and cluster ID.
Variable Declarations
let text = ref(localStorage.getItem('text') || "");
let channel;
let updatingFromChannel = false;
We declare three variables:
text: a ref (a reactive reference) that stores the current text value. It's initialized with the value stored in local storage, or an empty string if no value is stored.
channel: a variable that will store the PieSocket channel object.
updatingFromChannel: a boolean variable that keeps track of whether we're currently updating the text from the channel.
Function to Save Text to Local Storage
const saveTextToLocal = (text) => {
localStorage.setItem('text', text);
console.log(`Saved to local storage: ${text}`);
}
This is a function that saves the current text value to local storage. It takes the text value as an argument, stores it in local storage, and logs a message to the console.
Subscribing to PieSocket Channel
pieSocket.subscribe("text-room").then(ch => {
channel = ch;
console.log("Subscribed to channel:", channel);
channel.listen("move", data => {
console.log("Received data from channel:", data);
const receivedData = JSON.parse(data);
if (!updatingFromChannel) {
console.log("Updating text from channel:", receivedData.text);
updatingFromChannel = true;
text.value = receivedData.text;
saveTextToLocal(receivedData.text);
updatingFromChannel = false;
}
});
}).catch(error => {
console.error("Error subscribing to channel:", error);
});
This code subscribes to the "text-room" channel on PieSocket. When the subscription is successful, it sets the channel variable to the channel object and logs a message to the console.
It also sets up a listener for the "move" event on the channel. When the event is triggered, it receives data from the channel, parses it as JSON, and updates the local text value if we're not currently updating from the channel.
Function to Update Text and Publish to Channel
const updateText = () => {
console.log("Button clicked, updating text:", text.value);
saveTextToLocal(text.value);
if (channel) {
console.log("Publishing to channel:", text.value);
updatingFromChannel = true;
channel.publish("move", JSON.stringify({ text: text.value }))
.then(() => {
console.log("Successfully published to channel");
updatingFromChannel = false;
})
.catch(error => {
console.error("Error publishing to channel:", error);
updatingFromChannel = false;
});
}
};
This is the function that updates the text value and publishes it to the PieSocket channel when the button is clicked. It:
Logs a message to the console indicating that the button was clicked Saves the current text value to local storage Publishes the text value to the channel using the publish method Logs messages to the console indicating whether the publication was successful or not.
Lifecycle Hook
onMounted(() => {
console.log("Component mounted, initial text:", text.value);
});
This is a lifecycle hook that runs when the component is mounted. It logs a message to the console indicating that the component has been mounted, along with the initial text value.
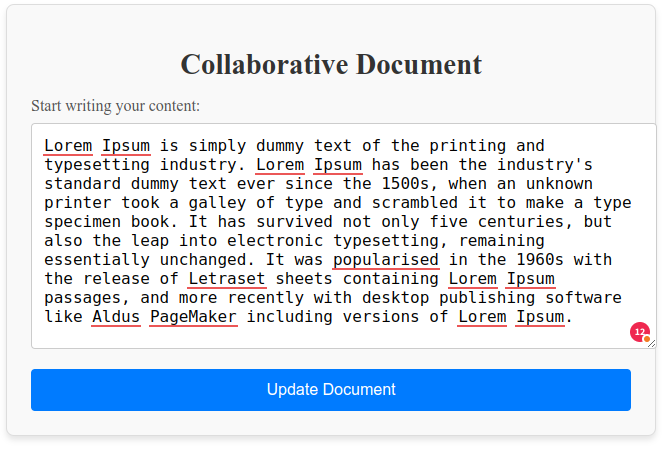
This is the full code of the app:
<template>
  <div id="app" class="container">
    <h1>Collaborative Document</h1>
    <label for="text-area" class="label">Start writing your content:</label>
    <textarea
      id="text-area"
      v-model="text"
      placeholder="Start writing..."
      class="text-area"
    ></textarea>
    <button @click="updateText" class="update-button">Update Document</button>
  </div>
</template>

<script setup>
import { ref, onMounted } from "vue";
import PieSocket from "piesocket-js";

const pieSocket = new PieSocket({
  clusterId: "Your_ClusterID",
  apiKey: "Your_API_Key",
});

let text = ref(localStorage.getItem("text") || "");
let channel;
let updatingFromChannel = false;

// Save text to local storage
const saveTextToLocal = (text) => {
  localStorage.setItem("text", text);
  console.log(`Saved to local storage: ${text}`);
};

// Subscribe to PieSocket channel
pieSocket
  .subscribe("text-room")
  .then((ch) => {
    channel = ch;
    console.log("Subscribed to channel:", channel);

    channel.listen("move", (data) => {
      console.log("Received data from channel:", data);
      const receivedData = JSON.parse(data);

      if (!updatingFromChannel) {
        updatingFromChannel = true;
        text.value = receivedData.text;
        saveTextToLocal(receivedData.text);
        updatingFromChannel = false;
      }
    });
  })
  .catch((error) => {
    console.error("Error subscribing to channel:", error);
  });

// Update text and publish to channel
const updateText = () => {
  console.log("Updating text:", text.value);
  saveTextToLocal(text.value);

  if (channel) {
    channel
      .publish("move", JSON.stringify({ text: text.value }))
      .then(() => {
        console.log("Successfully published to channel");
      })
      .catch((error) => {
        console.error("Error publishing to channel:", error);
      });
  }
};

onMounted(() => {
  console.log("Component mounted, initial text:", text.value);
});
</script>

<style scoped>
.container {
  max-width: 600px;
  margin: 2rem auto;
  padding: 1.5rem;
  background-color: #f9f9f9;
  border: 1px solid #ddd;
  border-radius: 8px;
  box-shadow: 0 4px 6px rgba(0, 0, 0, 0.1);
}

h1 {
  text-align: center;
  margin-bottom: 1rem;
  font-size: 1.8rem;
  color: #333;
}

.label {
  display: block;
  margin-bottom: 0.5rem;
  font-size: 1rem;
  color: #555;
}

.text-area {
  width: 100%;
  height: 200px;
  padding: 0.75rem;
  font-size: 1rem;
  border: 1px solid #ccc;
  border-radius: 4px;
  resize: vertical;
  outline: none;
}

.text-area:focus {
  border-color: #007bff;
  box-shadow: 0 0 3px #007bff;
}

.update-button {
  display: block;
  width: 100%;
  padding: 0.75rem;
  margin-top: 1rem;
  font-size: 1rem;
  background-color: #007bff;
  color: #fff;
  border: none;
  border-radius: 4px;
  cursor: pointer;
  text-align: center;
}

.update-button:hover {
  background-color: #0056b3;
}

@media (max-width: 768px) {
  .container {
    padding: 1rem;
  }

  h1 {
    font-size: 1.5rem;
  }

  .text-area {
    height: 150px;
  }
}
</style>
Now all you have to do is run the app with the given command:
npm run dev
Complete Code
The project is available on our GitHub : https://github.com/piehostHQ/collab-document