

Building a Simple Website Status Checker with Laravel
Lets learn how to create a website status checker in laravel
Rabikant
Mar 9, 2026
Developing a website status checker application is a perfect way of learning for both beginners and intermediate developers using Laravel framework. In this tutorial we will show you how to create a real time web application for checking the availability of sites and displaying status. In the final section we will deploy the project using Laravel’s controller, routing and templating capabilities which will offer you practical experience of modern web development.
By the end of this guide, you will have hit the ground running with an application that has a clean professional interface for this simple yet very functional application for checking whether a given website is reachable or not. This is how one can build it from the scratch to the logical end
Setting Up the Project
New Laravel Project
In your terminal, create a new Laravel project:
composer create-project laravel/laravel WebsiteChecker –prefer-dist
This will download and install all the required packages and generates a new Laravel application in a folder known as WebsiteChecker.
Laravel Development Server
Change into the project directory and start the development server:
cd WebsiteChecker
Run the migration:
php artisan migrate
This finishes the first design. Next up, let’s discuss the formation of the application’s backend functionality.
Website Checker Controller
Laravel controllers make it easy for us to manage our business logic, for instance when dealing with requests and responses. Run the following command to create a controller named WebsiteStatusController:
php artisan make:controller WebsiteStatusController
Laravel will generate this controller file under the path App\Http\Controllers\WebsiteStatusController
Open WebsiteStatusController.php and add the following code:
<?php

namespace AppHttpControllers;

use IlluminateHttpRequest;
use IlluminateSupportFacadesHttp;

class WebsiteStatusController extends Controller
{
    public function checkWebsiteStatus(Request $request)
{
    // Use regex to allow partial URLs without protocol (e.g., "google.com")
    $request->validate([
        'url' => 'required|regex:/^((https?://)?(www.)?[w-]+.w{2,})(/[w-]*)*$/'
    ]);

    // Add "https://" if no protocol is specified
    $url = $request->input('url');
    if (!preg_match("~^(?:f|ht)tps?://~i", $url)) {
        $url = "https://" . $url;
    }

    try {
        $response = Http::timeout(5)->get($url);

        if ($response->successful()) {
            return response()->json(['status' => 'up', 'message' => 'The website is up and running!']);
        } else {
            return response()->json(['status' => 'down', 'message' => 'The website is down.']);
        }
    } catch (Exception $e) {
        return response()->json(['status' => 'down', 'message' => 'Could not reach the website.']);
    }
}

}
In this WebsiteStatusController controller for your Laravel application, we are creating a method called checkWebsiteStatus. This method takes the website URL from the user and after its verification and if necessary, its formatting checks whether the passed website is available. Here’s a breakdown of each part:
Validation of Input
   $request->validate([
        'url' => 'required|regex:/^((https?://)?(www.)?[w-]+.w{2,})(/[w-]*)*$/'
    ]);
Validation Rule: This rule ensures that the input is made (required parameter) and is in the required pattern that shall have been defined by a regular expression (regex parameter). - The regex rule allows for URLs with or without http:just do not start the string with www.or://. - This means users can enter example.com, https:It should also pass validation if its domain name is written as example.com, or www.example.com.
URL Protocol Check and Addition
    $url = $request->input('url');
    if (!preg_match("~^(?:f|ht)tps?://~i", $url)) {
        $url = "https://" . $url;
    }
Input Check**: Following extraction of the input, we then use a regular expression check to see if the URL starts with ‘http://’ or ‘https://’.
- Add Protocol: In the case where the URL does not include ‘/’ and does not contain a protocol i.e http:// or https:// we allow ‘https://’ to appear before the URL so that the URL format is right for the request. This is particularly pertinent, in particular if the user has set only the domain (for example: ‘google.com’).
HTTP Request to the URL
    try {
        $response = Http::timeout(5)->get($url);
- HTTP Request: Using Laravel's Http facade, this sends a GET request to the URL.
- Timeout: timeout(5) specifies a 5-second timeout for the request. If the server doesn’t respond within 5 seconds, the request will throw an exception.
Status Check and Response
    if ($response->successful()) {
            return response()->json(['status' => 'up', 'message' => 'The website is up and running!']);
        } else {
            return response()->json(['status' => 'down', 'message' => 'The website is down.']);
        }
- Response Check: After the request, the successful() method checks if the response status code indicates success (i.e., in the 200 range).
- JSON Response:
- If the website is accessible (status 200), it responds with a JSON object indicating the website is "up."
- If the status code is outside the 200 range, the response indicates that the website is "down."
Exception Handling
catch (Exception $e) {
        return response()->json(['status' => 'down', 'message' => 'Could not reach the website.']);
    }
- Catch Block: If any errors occur during the HTTP request (e.g., if the website doesn’t exist, or there’s a timeout), the exception is caught.
- Error Response: If an error occurs, it returns a JSON response indicating that the website could not be reached.
Summary
- Validates the URL format, allowing partial URLs.
- Adds https:// if missing for easier user input.
- Attempts to connect to the website with a GET request.
- Returns JSON indicating if the website is accessible (up) or inaccessible (down).
- Handles errors gracefully if the request fails.
This setup provides a robust solution for checking a website’s status and handling both user and network errors effectively.
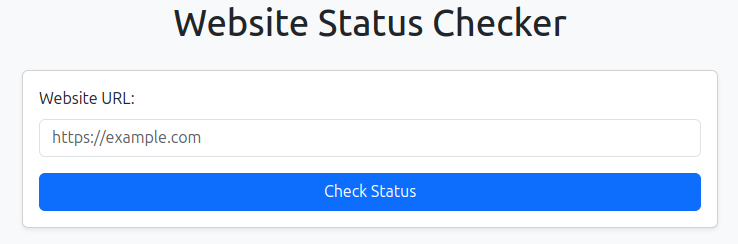
Designing the User Interface
For the front-end interface, we’ll use Bootstrap to create a clean and responsive design. The goal is to build a simple form where users can input a URL and receive feedback on its status.
Create the Blade View File
In the resources/views directory, create a new file named check-website-status.blade.php:
<!DOCTYPE html>
<html lang="en">
<head>
    <meta charset="UTF-8">
    <meta name="viewport" content="width=device-width, initial-scale=1.0">
    <title>Website Status Checker</title>
    <!-- Add Bootstrap CSS -->
    <link href="https://cdn.jsdelivr.net/npm/bootstrap@5.3.0/dist/css/bootstrap.min.css" rel="stylesheet">
</head>
<body class="bg-light">

    <div class="container mt-5">
        <h1 class="text-center mb-4">Website Status Checker</h1>

        <div class="card shadow-sm">
            <div class="card-body">
                <form id="status-check-form" action="/check-website-status" method="POST">
                    @csrf
                    <div class="mb-3">
                        <label for="url" class="form-label">Website URL:</label>
                        <input type="text" name="url" id="url" class="form-control" placeholder="https://example.com" required>
                    </div>
                    <button type="submit" class="btn btn-primary w-100">Check Status</button>
                </form>

                <div id="result" class="mt-3 alert d-none"></div>
            </div>
        </div>

    </div>

    <!-- Add Bootstrap JS and Popper.js for interactive components -->
    <script src="https://cdn.jsdelivr.net/npm/@popperjs/core@2.11.6/dist/umd/popper.min.js"></script>
    <script src="https://cdn.jsdelivr.net/npm/bootstrap@5.3.0/dist/js/bootstrap.min.js"></script>

    <script>
        document.getElementById('status-check-form').addEventListener('submit', function (e) {
            e.preventDefault();

            const formData = new FormData(this);

            fetch('/check-website-status', {
                method: 'POST',
                body: formData,
                headers: {
                    'X-Requested-With': 'XMLHttpRequest',
                },
            })
            .then(response => response.json())
            .then(data => {
                const resultDiv = document.getElementById('result');
                resultDiv.classList.remove('d-none', 'alert-success', 'alert-danger');

                if (data.status === 'up') {
                    resultDiv.classList.add('alert-success');
                    resultDiv.innerText = data.message;
                } else {
                    resultDiv.classList.add('alert-danger');
                    resultDiv.innerText = data.message;
                }
            })
            .catch(error => {
                const resultDiv = document.getElementById('result');
                resultDiv.classList.remove('d-none', 'alert-success');
                resultDiv.classList.add('alert-danger');
                resultDiv.innerText = 'An error occurred while checking the website status.';
            });
        });
    </script>
</body>
</html>
This template sets up a Bootstrap-styled form with a JavaScript function to handle the form submission asynchronously. This way, the result appears dynamically without refreshing the page.
Defining the Routes
In routes/web.php, define routes to serve the form and handle the submission:
use AppHttpControllersWebsiteStatusController;

Route::post('/check-website-status', [WebsiteStatusController::class, 'checkWebsiteStatus']);
Route::get('/check-website', function () {
    return view('check-website-status');
});
The /check-website route serves the form, while /check-website-status handles the POST request.
Testing the Application
Run the application:
php artisan serve
Visit http://127.0.0.1:8000/check-website in your browser and enter a URL. The application will display the website’s status dynamically!
Expanding the Application
To improve the app, consider adding features like:
- Error Logging: Track failures or issues with URLs.
- Rate Limiting: Prevent abuse by limiting the number of checks.
- Styling Enhancements: Add animations or more dynamic styling.
Conclusion
This tutorial walked you through creating a Laravel application that checks website statuses. We built the backend, added routes, and designed a responsive UI. Happy coding!
Complete Code
The project is available on our GitHub : https://github.com/piehostHQ/website-status-checker