
Vishal
Nov 15, 2024
How to create a privileged root user in MySQL
How to create a privileged root user in MySQL
About MySQL
MySQL is a common open source RDBMS which is now one of the largest – used databases in the world. It was originally developed in 1995 by MySQL AB of Sweden and then acquired by Sun Micro Systems in 2008 and then by Oracle Corporation in 2010. As earlier indicated, MySQL has become popular in database management due to its performance, reliability, and usability in all over the world.
Key Features and Architecture
MySQL is a client-server database model based on that. The MySQL server is arguably the most important component of this system, since it processes all the instructions directed towards the database, while simultaneously ensuring the integrity of the database is not violated. Users access the server to retrieve the data, modify it, or perform other functions on the data. MySQL employs SQL as its command language, which is a special language used to manage relational databases.
MySQL also has many storage engines, for example, InnoDB, MyISAM, and others thanks to which it creates attention. InnoDB, the default storage engine of MySQL, provides fully implemented, bytes-near-ACID transaction support for data modification transactions needed to support a class of applications needing high reliability. MyISAN, on the other hand, is very fast, and convenient enough for read-only workloads where transactions are unnecessary
MySQL also has reproduction, that is, copying of data from one MySQL server to another with the intention of data replication and distribution of workload. This feature will be of most importance in distributed systems where availability is immensely important. Besides, in MySQL, table partitioning entails dividing a large table into several parts, making it contribute to optimizing the query.
About root
On Ubuntu as in other Linux-based operating systems, the root user is the superuser, which has full privileges. This user has the highest level of privilege since they can do anything to the system and perform all actions that normal users cannot, for instance, install or delete some software or modify files and settings that will impact all the users of the system.
Key Characteristics of the Root User:
Unlimited Privileges: Being the system administrator, the root user has total control and floods can perform any command. This involves adding, creating, or deleting key system data needed in the operation of the system, which is executed errantly, might lead to system failure.
Security Risks: Due to the immense control the root user has, using a root account is often dangerous. One more disadvantage is that, when using a terminal and being logged in as root, the mistake can lead to great consequences. That is why direct root access is turned off or limited on Ubuntu and other distributions.
Sudo Command: In Ubuntu Linux, there is no direct login as root administrator but when one needs to do privileged operations, he enters sudo. Sudo is an abbreviation of ‘superuser do’ This is a utility that permits a particular user to provide the command as superuser or any other user for some reason under the security policy. For their example, the command; sudo apt-get update the system’s package lists as the root user.
Root Directory: The home directory of the root user is the /root, which is quite different from /, which refers to the root of the file system. To begin with, the root directory or (/) is the main directory over the trees containing all the directories in the filesystem.
How to Install MySQL
Step 1. Update Package
Update your Package List with this command:
sudo apt update
Step 2. Install MySQL
Install the MySQL server on your system with this command:
sudo apt install mysql-server
Step 3. Secure the installation
MySQL comes with a security script to set up important security features like setting the root password, removing anonymous users, and disallowing remote root login:
sudo mysql_secure_installation
During this process, you’ll be prompted to set up a root password, remove anonymous users, disallow root login remotely, and remove test databases. Follow the prompts and configure the server as per your requirements.
For Cent/RHEL
Step 1. Install MySQL repository
We will install MySQL repository using yum:
sudo yum localinstall https://dev.mysql.com/get/mysql80-community-release-el7-3.noarch.rpm
Yum (Yellow dog Updater, modified) is a free and open-source package manager on Linux. It is mainly used for RPM-based Linux distributions like Red Hat Enterprise Linux, CentOS, and Fedora.
Step 2. Install MySQL server
Run this command to install the MySQL server:
sudo yum install mysql-server
Step 3. Start MySQL server
After installing the MySQL server, we need to start it:
sudo systemctl start mysqld
Step 4. Secure Installation
After installation secure our installation
sudo mysql_secure_installation
Install On Windows
Now, we will see how to install on Windows
Step 1. Download MySQL installer
Open MySQL on your favourite browser from here.

When you visit this URL, a page will appear like this:
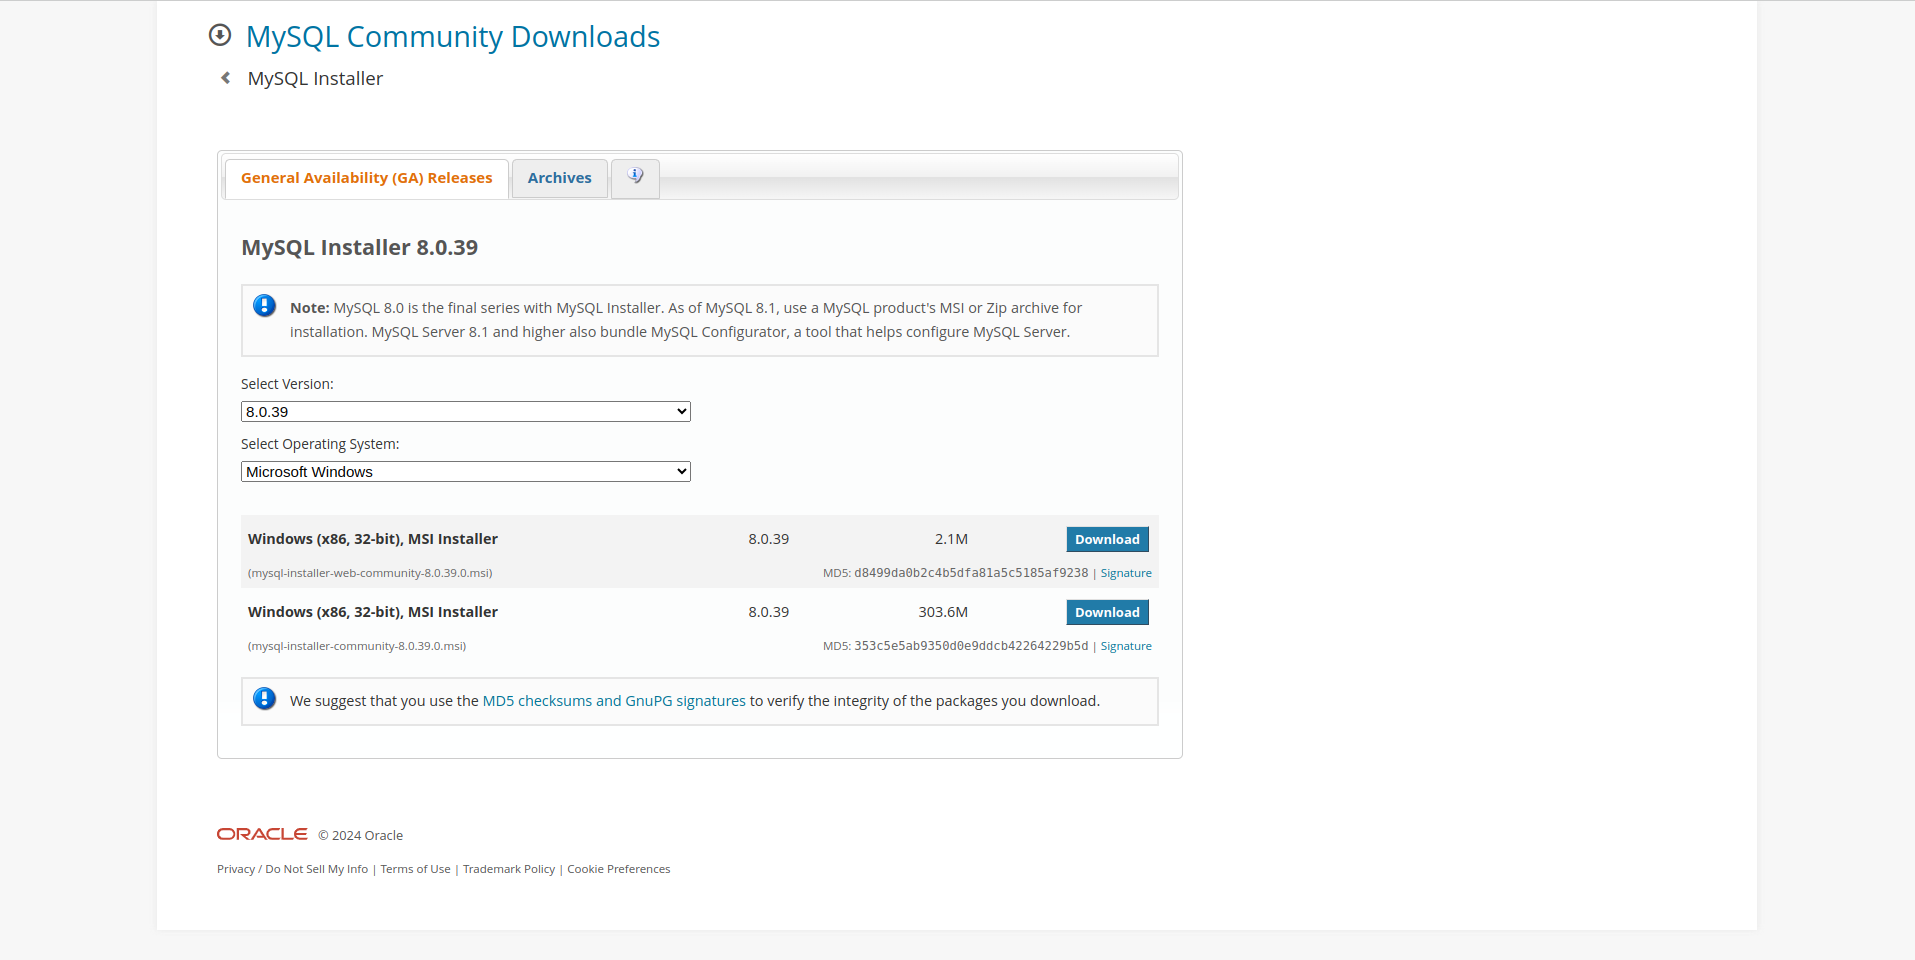
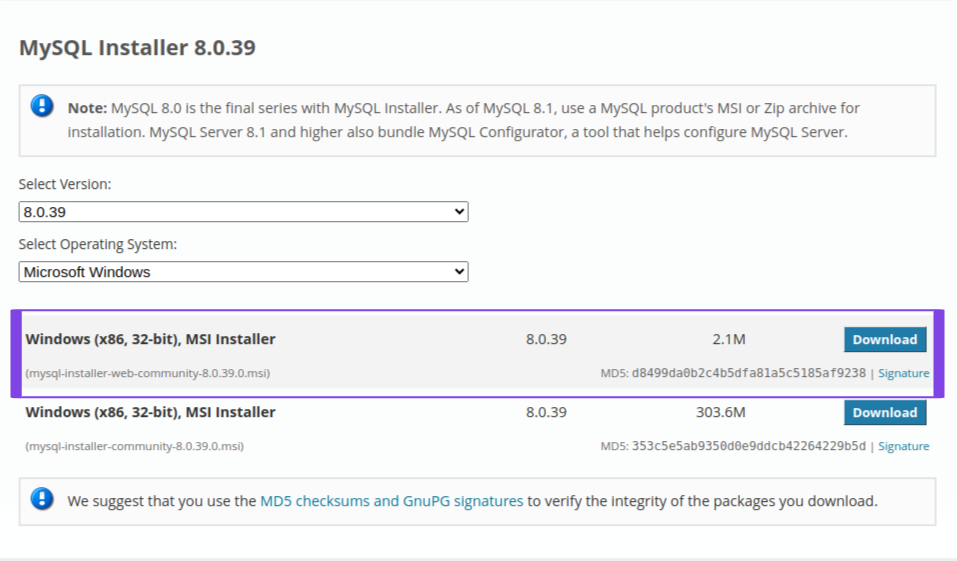
After this, click on the first download button:
Click on No, thanks, just start my download:
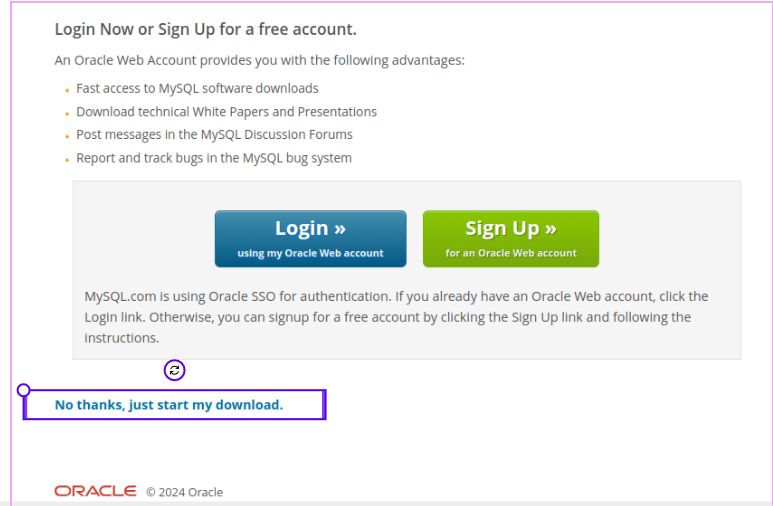
Your Download will be started and when your download is complete, install it.
About Apache
Apache is a fast and flexible web server application of open-source code, which has greatly contributed to forming the current Internet. More formally unofficially called the Apache HTTP Server, it was developed and released by the Apache Software Foundation (ASF) in 1995. Since then, it has become one of the industry standard web servers, considered to be fast, highly configurable and packed with features.
In its basic form, Apache is a disseminating tool for web information and application content over the World Wide Web. It handles HTTP requests from clients (for instance web browsers) and provides the asked for results, documents or resources. Apache has a modular design as a basic concept, which has been designed in such a way that numerous modules can be developed by the users to integrate with the basic functionalities of Apache. These modules can support other works including authentications, rewriting URLs, or load distribution making Apache to be versatile.
Apache is rather flexible, which can be considered as one of the company’s major benefits. Contrary to many other programming languages, the server can be tailored to fit almost any requirements – from a personal Website to a large-scale and popular application. Its configuration is made by the means of text files, of which the most essential is the http.conf file. This Configuration file enables the system administrator to identify the parameters of the operation of the server, security features, performance and virtual hosting parameters among others.
Another significant feature is the Apache support of Virtual Hosts. Virtual hosting, in addition to creating the impression of multiple Apache servers, enables one actual server to host multiple websites or domains. This is especially helpful for web hosting services providers or an organization that may be having several websites and need to host them from the one server. Apache supports both name-based and IP-based virtual hosting, this allows a lot of flexibility as to how the sites are configured.
Step 1. Install Apache
Before setting up MySQL, we need a server like Apache
Very first, install Apache on your system with this command
sudo apt install apache2
Step 2. Adjust Firewall
Check UFW list by running this command:
sudo ufw app list
This command might be asked for password, so just type your system password and press enter
Output
Available applications:
  Apache
  Apache Full
  Apache Secure
  CUPS
If Apache is showing in your list, it means it downloaded successfully
Now give permission to Apache
sudo ufw allow 'Apache'
Check the status to verify the changes
Status: active

To                         Action      From
--                         ------      ----
Apache                     ALLOW       Anywhere
Apache (v6)                ALLOW       Anywhere (v6)
Step 3. Check Apache status
Now check status of your Apache server, is it active or not with this command:
sudo systemctl status apache2
Output
● apache2.service - The Apache HTTP Server
     Loaded: loaded (/usr/lib/systemd/system/apache2.service; enabled; preset: >
     Active: active (running) since Tue 2024-08-20 09:46:41 IST; 1h 0min ago
       Docs: https://httpd.apache.org/docs/2.4/
    Process: 1446 ExecStart=/usr/sbin/apachectl start (code=exited, status=0/SU>
   Main PID: 1667 (apache2)
      Tasks: 6 (limit: 18793)
     Memory: 33.5M (peak: 34.3M)
        CPU: 281ms
Create a MySQL root user with all privileged
\### Step 1. Open MySQL
Run this command to Open MySQL if you are creating a user for the first time:
sudo mysql
If you already have a user, it doesn't matter if it is admin or not, run this command:
sudo MySQL -u userName -p
After running that a prompt will appear for a password, enter your user password and then press enter.
Step 2. Creating User
Now that you are logged in as the root user, you can create a new superuser. This involves creating a new user and granting them all privileges on the MySQL server.
After that, create a user by running this command:
CREATE USER 'vishal'@'localhost' IDENTIFIED BY 'password';
In my case, I am using ‘Vishal’ as the username and ‘password’ as the Password, you can use another name or password as you want. And must use a heavy password for security.
Step 3. Grant Permissions to your user
For creating a superuser we need to give all permission to our user. Run this command in your terminal:
GRANT ALL PRIVILEGES ON *.* TO 'vishal'@'localhost' WITH GRANT OPTION;
- indicates that the user has privileges on all databases and tables.
- WITH GRANT OPTION allows the superuser to grant the same privileges to other users.
This command will give all grants to your user.
Step 4. Flush Privilege
Run this command to flush privilege:
FLUSH PRIVILEGES;
Step 5. Verify grants
SHOW GRANTS FOR 'username'@'host';
This command will show you all permissions you have if it's showing means you are done
Step 6. Exit MySQL
when we are done, then we can exit MySQL by typing this command:
exit
After this, everything is done, and you are ready to use MySQL in your project